

The EPA (U.S. Environmental Protection Agency) is a great educational resource that not everyone is aware of, so we like to share some of their experiments and informative web pages whenever possible. They have some great information about acid rain, and several experiments on this topic.
Here’s another great acid rain experiment from the US EPA on measuring soil pH. However, we’re going to modify this experiment for use with our pH test strips rather than using a reagent kit.
Background
There are many different factors in soil that affect plant health, including nutrient availability, temperature, water, salinity, etc. The pH of soil affects nutrient availability, and therefore has a great influence on plant health. Soil with a pH below 7 is acidic, while soil with a pH above 7 is alkaline. The optimal pH range for most plants is between pH 5.5 and 7.0, however, many plants have adapted to flourish at pH values outside this range.
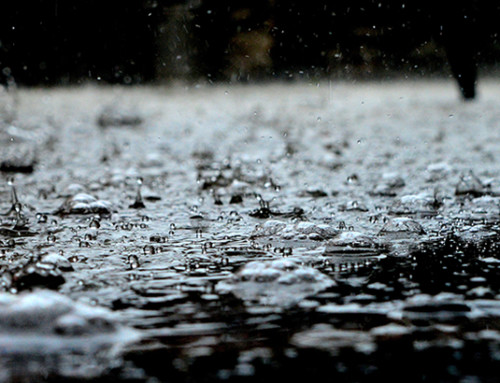
Soil pH varies by region because it can be affected by factors such as climate (temperature and rainfall), mineral content, and soil texture. High amounts of rainfall can result in more acidic soil. The same minerals that affect water hardness, calcium and magnesium, can also affect the pH of soil. Soils with a lot of clay and organic matter have more buffering capacity than sandy soils and remain at a more neutral pH.
Thus, just like water hardness levels vary across the U.S., so does soil pH. Try searching online for a map of soil pH across the U.S. to determine what the average might be in your state. Once you have a rough idea, it’s time to do some testing.
Materials
- Distilled water
- 2 cups of soil from each of 2 or 3 different locations
- Teaspoon
- Digging tool
- 2-3 Ziplock bags
- pH 1-14 test strips
- 4-6 Plastic cups
- 2-3 Coffee filters
- Stir stick or spoon
- Laboratory notebook
Instructions
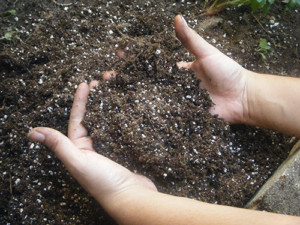
- When selecting locations for your soil samples, think about the surroundings and how they might affect the soil pH. For example, soil near a water source may have a different pH than soil in a dry location. You might also sample garden soil or soil near different plants to see how they might affect the pH. Get creative and try to find unique soil samples.
- Using a garden trowel or other digging tool, dig about 2 inches down into the soil. Shovel 2 cups of soil into a ziplock bag, and label the bag with the location. Observe each location you sample, and make notes in your laboratory notebook. Wipe your trowel clean after collecting each soil sample to avoid cross-contamination.
- Once you have collected your samples, it’s time to test them. For every soil sample you collected, you’ll need to place a couple of teaspoons of soil into a plastic cup. Label each plastic cup just like you did the ziplock bags.
- Fill each cup with distilled water so it just covers the soil. Distilled water will not change the soil pH. Stir, shake or swirl the sample vigorously for one minute. Clean your stirrer in between each soil sample to avoid cross-contamination.
- Now, you’ll need to let each soil sample rest for at least 30 minutes.
- Next, you’ll need a fresh set of plastic cups for each soil sample. Again, label each plastic cup, so you know where the sample came from. Hold a coffee filter over the unused cup, and pour the liquid soil sample over the filter. This will keep the soil chunks out, but will allow the water sample through. Repeat for each soil sample.
- Using a pH 1-14 test strip, dip the strip into the soil water and remove. Immediately compare to the included color chart to get a pH reading. Test strips are only good for one-time use, so you will need a fresh test strip for each soil sample. Record your results in your laboratory notebook.
What were the differences in plant life, animal life, water sources, etc. at each soil sample location? How do you think that affected the soil pH? Did you have any acidic soil samples or any alkaline soil samples? Do you think the time of year affected your results? How might different seasons change the soil pH?
Going Further
A couple of ways to take this experiment a step further would be to try some different pH test strips in a narrower range with smaller increments, and to identify various plants near the soil samples taken.
 Our pH 1-14 test strips cover the entire pH range in increments of 1.0 pH units. If you have an idea of the general pH of the soil in your region, you could use a narrow-range pH test strip for more accurate results. For example, if all of your soil samples were acidic, you could try the pH 4-7 test strip, which has increments of 0.4 pH units.
By identifying plant life near your soil samples, you can do research on those plants to determine what soil pH they typically thrive in. Have any of them adapted to a different soil pH? What other plant life might you expect to find at each location based on the soil pH?
If you wanted to grow certain plants, but the soil you had was not the ideal pH, what would you do to adjust it?
As always, thanks for joining us, and good luck scientists!


Leave A Comment